Updated: 3rd August 2025
If you’re passionate about bike touring, commuting, or bikepacking but your bike lacks the traditional mounting eyelets, don’t worry—you’re not stuck without cargo-carrying options. Many modern road bikes, mountain bikes, and even some hybrid bikes come without the threaded mounting holes (eyelets or braze-ons) that make rack installation straightforward. However, with the right approach and equipment, you can still transform your bike into a capable cargo hauler.
If you’re specifically wondering about running panniers on a road bike, I’ve covered that topic in detail, as road bikes are among the most common bikes that lack proper mounting points for traditional touring setups.
A Personal Note: Why Getting the Right Setup Matters
Before we dive into the technical solutions, I want to share something important from my own experience. My adventure cycling journey began with a completely overloaded road bike and what turned out to be a failed trip. The experience was so terrible—dealing with an inadequate setup, constant mechanical issues, and the frustration of gear that just wasn’t working—that I almost never went on another bike trip. That would have been a tragedy, because I would have missed out on all the incredible experiences and beautiful places that bicycle travel has shown me since.
While I absolutely love encouraging people to get out there and experience the wonderful world of bike travel with whatever bike they have, I’ve learned there’s a balance. You don’t want your first adventure to be so miserable that it becomes your last. A poorly set up bike with inadequate mounting solutions can turn what should be an amazing experience into a nightmare of shifting loads, broken equipment, and safety concerns.
That’s why, alongside these practical mounting solutions, I always recommend doing your due diligence to optimize your bike for adventure cycling. Whether you’re adapting your current bike or considering an upgrade, having the right setup makes an enormous difference in your enjoyment and safety on the road. If you need help finding your dream touring setup, we offer a comprehensive 2-hour course in our community Wheels of Discovery – join for free today and get the guidance you need to make your bike adventures everything they should be.
Understanding the Challenge: Why Some Bikes Don’t Have Eyelets
Eyelets are small threaded holes in the bike frame, typically located on the rear dropouts, seat stays, and fork legs. They’re standard on touring bikes because they provide secure, stable mounting points for racks. However, many bikes lack these features for several reasons:
- Weight reduction: Removing eyelets saves a few grams, important for racing bikes
- Aesthetic design: Clean lines without mounting holes appeal to many cyclists
- Cost savings: Manufacturing bikes without eyelets is slightly cheaper
- Frame material limitations: Some carbon fiber frames can’t accommodate traditional eyelets
Before You Start: Important Considerations
Weight Limits and Safety
Before installing any rack system, understand your bike’s limitations. Most alternative mounting methods have lower weight capacities than traditional eyelet-mounted racks. Generally:
- Traditional touring racks: 40-60 lbs capacity
- Clamp-on racks: 20-35 lbs capacity
- Seatpost racks: 15-25 lbs capacity
Frame Compatibility
Check your bike’s frame material and geometry:
- Carbon fiber: Requires special care to avoid damage; use padded clamps
- Steel/Aluminum: More forgiving but still needs proper clamping force
- Frame clearance: Ensure adequate space between rack and wheels/brakes
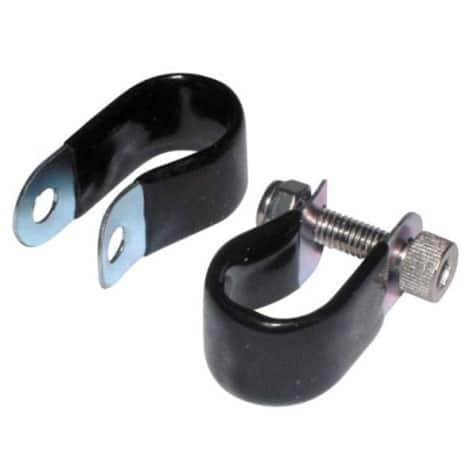
Method 1: P-Clamps – The Versatile Budget Solution
Best for: Steel and aluminum frames, temporary setups, budget-conscious cyclists
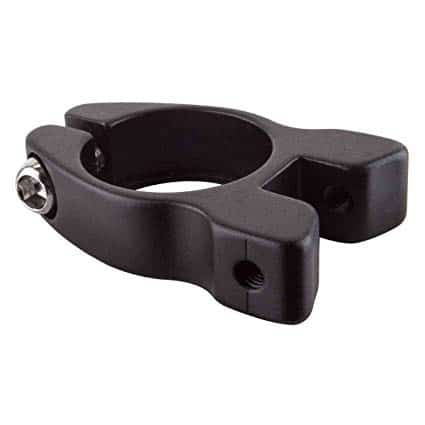
P-clamps (also called cushioned loop clamps) are metal bands with rubber padding that wrap around frame tubes. They’re the most affordable and versatile solution for eyelet-free mounting.
How P-Clamps Work
- Sizing: Measure your frame tubes (typically 25-35mm diameter)
- Positioning: Clamp to seat stays and chain stays for rear racks
- Installation: Wrap around tube, insert rack strut, tighten bolt
Pros and Cons
Pros
- Easy to install and remove
- Adjustable to various tube sizes
- Available at most hardware stores
- Extremely affordable ($5-15 per clamp)
Cons
- Not suitable for carbon frames
- May scratch frame finish over time
- Can slip under heavy loads if not properly tightened
- Lower weight capacity (20-30 lbs typical)
Installation Tips
- Use rubber padding between clamp and frame
- Apply anti-seize compound to prevent corrosion
- Check tightness regularly, especially after first few rides
- Position clamps away from cable routing
Method 2: Manufacturer-Specific Clamp Systems
Best for: Quality installations, higher weight capacity, long-term use
Tubus Stay Mounting Clamps
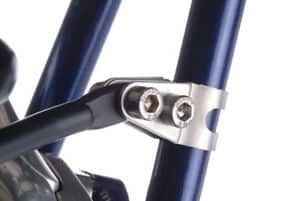
Tubus, a premium rack manufacturer, offers specialized clamps designed specifically for their racks. These provide better weight distribution and security than generic P-clamps.
Features:
- Engineered for specific rack models
- Higher weight capacity (up to 40 lbs)
- Better vibration resistance
- Professional appearance
Old Man Mountain Quick Release System
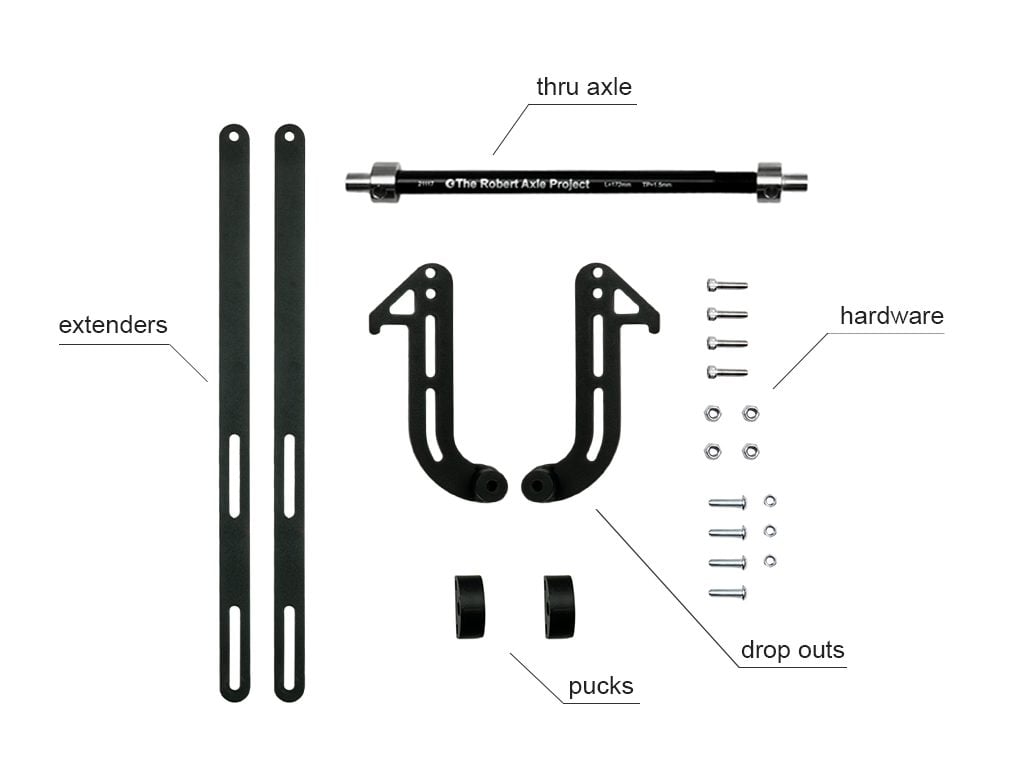
This system replaces your rear wheel’s quick-release skewer with an extra-long version that supports the rack. It’s particularly clever because it:
- Uses the wheel axle as a mounting point
- Distributes weight through the strongest part of the frame
- Allows easy wheel removal for transport
- Works with most frame geometries
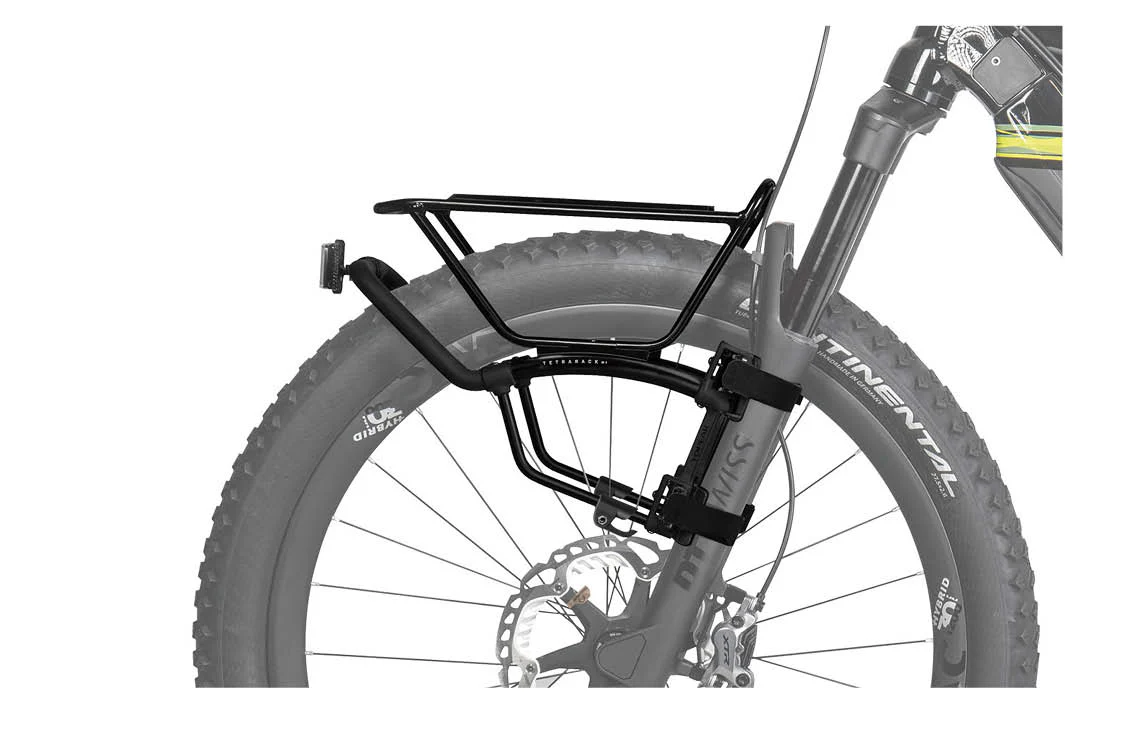
Old Man Mountain also makes excellent front racks that work with bikes lacking front eyelets. If you’re considering a complete front and rear setup for touring or bikepacking, check out my comprehensive guide on the best front bike racks for touring and bikepacking where I cover 12 top options including several Old Man Mountain models that excel at mounting on eyelet-free bikes.
Axiom and Blackburn Clamp Systems
These manufacturers offer various clamp-on solutions:
- Axiom Streamliner: Mounts to brake bridge and uses quick-release lower mounting
- Blackburn: Multiple models with different clamping mechanisms
Method 3: Seatpost-Mounted Racks
Best for: Light loads, occasional use, bikes with very limited mounting options
Seatpost racks attach directly to your seatpost, eliminating the need for frame mounting entirely.
How They Work
These racks clamp around the seatpost and extend backward to provide a cargo platform. Some models also include side rails for panniers.
Popular Models
- Topeak MTX BeamRack: Modular system with various accessories
- Blackburn Central Rear Rack: Simple, lightweight design
- Axiom Journey Uni-Fit: Adjustable for different seatpost diameters
Important Limitations
- Weight stress: All weight transfers through the seatpost and seat tube
- Handling changes: High-mounted weight affects bike stability
- Seatpost requirements: Needs sufficient exposed seatpost length
- Not suitable for: Carbon seatposts or very heavy loads
Method 4: Suspension Fork Solutions
Best for: Mountain bikes, hybrid bikes with front suspension
Front suspension forks present unique challenges since they move constantly. Special racks are designed to work with suspension:
Zefal Raider Front Rack
- Mounts to brake studs and fork crown
- Accommodates suspension travel
- Lightweight aluminum construction
- Includes bungee attachment points
Considerations for Suspension Forks
- Ensure rack doesn’t interfere with suspension travel
- Check for cable clearance during compression
- Some racks may affect steering precision
- Regular maintenance more critical due to moving parts
Alternative Solutions: Bikepacking Bags
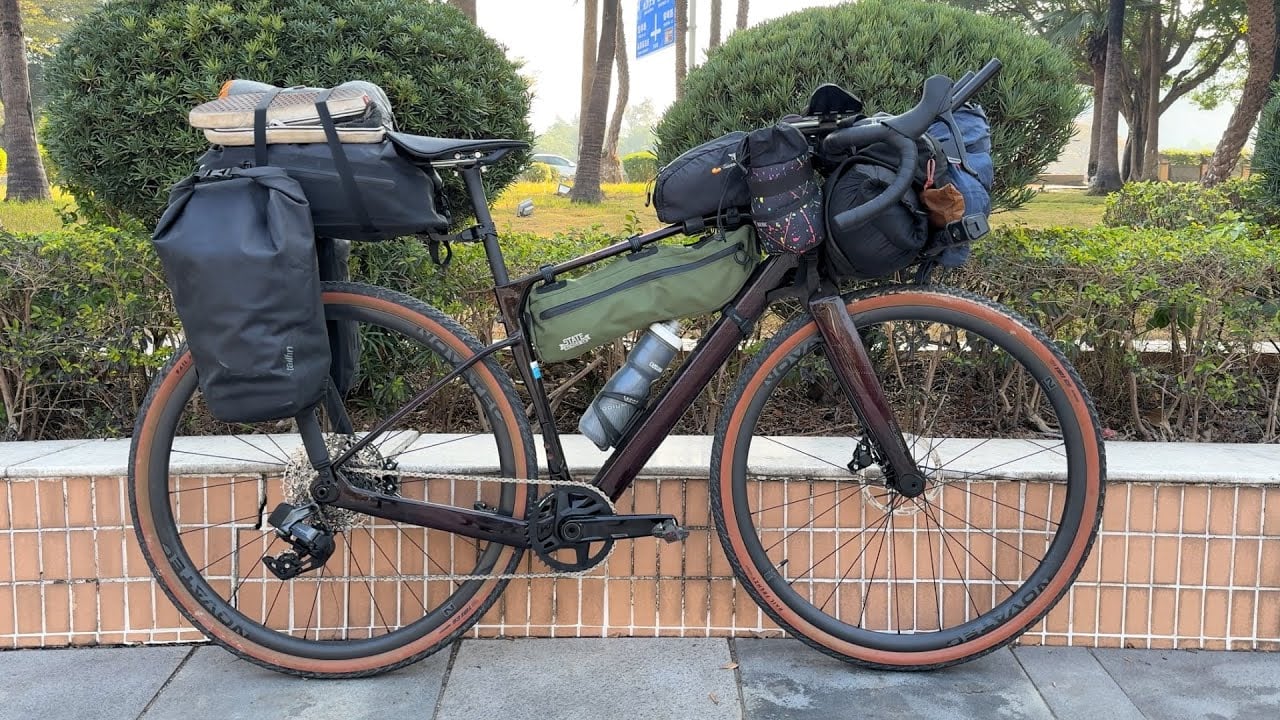
Best for: Minimalist touring, rough terrain, frame protection
If traditional racks don’t suit your needs, consider bikepacking bags that attach directly to the frame:
Frame Bags
- Mount inside the main triangle
- Carry tools, food, and small items
- Don’t affect bike handling significantly
Seat Packs
- Attach under the saddle
- Range from small tool storage to large touring loads
- No frame stress compared to seatpost racks
Handlebar Bags
- Mount to handlebars or stem
- Good for frequently needed items
- Some models work with drop bars
Step-by-Step Installation Guide
For P-Clamp Installation:
- Prepare the bike: Clean frame tubes where clamps will attach
- Measure tube diameter: Use calipers for accurate sizing
- Purchase appropriate clamps: Buy extras for backup
- Dry fit the rack: Position rack and mark clamp locations
- Install clamps:
- Place rubber padding on frame
- Position clamp and rack strut
- Tighten gradually in cross pattern
- Check alignment and adjust
- Test the system: Load progressively and check for movement
- Final adjustments: Ensure even weight distribution
For Manufacturer Systems:
- Read instructions carefully: Each system has specific requirements
- Check compatibility: Verify your bike and rack are compatible
- Gather required tools: Usually Allen keys and possibly wrenches
- Follow manufacturer torque specifications: Over-tightening can damage frames
- Test thoroughly: Check all connections before loading
Maintenance and Safety Tips
Regular Inspections
- Check clamp tightness weekly
- Inspect for frame wear or damage
- Look for rack fatigue or cracking
- Ensure all bolts remain secure
Loading Guidelines
- Distribute weight evenly
- Keep center of gravity low
- Secure all cargo properly
- Start with light loads and increase gradually
Frame Protection
- Use frame tape under clamps
- Apply protective film to potential wear areas
- Consider clear protective tape for carbon frames
- Regular cleaning prevents corrosion
Troubleshooting Common Issues
Rack Movement or Slipping
- Check clamp tightness
- Verify proper clamp size
- Add rubber padding for better grip
- Consider upgrading to manufacturer-specific clamps
Frame Damage
- Inspect regularly for wear marks
- Use proper torque specifications
- Add protective padding
- Consider professional installation for expensive frames
Handling Problems
- Reduce cargo weight
- Lower center of gravity
- Check rack alignment
- Practice riding with loaded bike
Cost Comparison and Recommendations
Budget Options ($20-50)
- Generic P-clamps with basic rack
- Good for light use and experimentation
- Adequate for short tours or commuting
Mid-Range ($50-150)
- Manufacturer-specific clamp systems
- Better weight capacity and durability
- Suitable for regular touring
Premium Options ($150-300)
- High-end clamp systems with quality racks
- Professional installation recommended
- Best for serious touring and heavy use
Finding the Right Solution for Your Needs
Installing a bike rack without eyelets is entirely possible with the right approach. The key is matching the solution to your specific needs:
- For occasional use: P-clamps offer an affordable, flexible solution
- For regular touring: Invest in manufacturer-specific clamp systems
- For light loads: Consider seatpost racks or bikepacking bags
- For suspension forks: Choose specialized suspension-compatible racks
Remember that any alternative mounting method requires more attention to maintenance and weight limits than traditional eyelet-mounted racks. Start with lighter loads, inspect your system regularly, and don’t hesitate to upgrade if your needs change.
While these solutions can help you get started with the bike you have, don’t forget the bigger picture. If you find yourself falling in love with bike touring and adventure cycling, consider how you might optimize your setup for the long term. The difference between a bike that’s barely adequate and one that’s truly designed for touring can transform your entire experience on the road.
With proper planning and installation, you can transform almost any bike into a capable touring or commuting machine, regardless of whether it came with mounting eyelets. The cycling adventure you’re planning doesn’t have to wait for a new bike—it can start with the one you already have. Just remember to start smart, stay safe, and don’t let a poor first experience keep you from discovering the incredible world of bicycle travel.
For more guidance on building the perfect touring setup and avoiding the mistakes that could derail your adventure cycling dreams, join our free community at Wheels of Discovery where we help cyclists find their ideal touring bike and setup.
About The Author