I cannot believe I didn’t think of this before. It was just recently that I came across the idea to combine two epic ways to explore into one truely awesome adventure. Rafting + bikepacking sounds like a match made in heaven!
Since coming across this rather new mode of exploring I have been research frantically on the internet to find out all that I need to know before I head out! Like first I need to get a raft! I was wondering what is the best packraft for bikerafting? and all these other questions.
I read around and all the information I found I have gathered it into this comprehensive blog post. Hopefully to save you the time from having to search everything yourself. All you need to know is here, if you want to go on a epic bikerafting adventure too.
This is in my mind at least the most epic adventure idea or style! So what is bikerafting? Well it is essentially using a bikepacking bike most commonly a fat bike that can get you pretty much anywhere on really tough terrain. Then when it comes time to water crossings or exploring the white water streams and rivers you unpack your packraft which is on your bike setup. Strapping your bike to the packraft and head off on some water adventures.
A while back I had this dream to get a kayak and paddle the length of the Murray River which boarders Victoria and NSW and SA, here in Australia. But it makes perfect sense to get a packraft instead and bring my surly LHT along for the adventure. During the planning stage I was like how would I cart around a long kayak, I would need special mounts for my car racks and all this trouble and extra gear would be need to accommodate such a large vestal. With a packraft you can just pack them away in your handlebar pack.
How To Bikeraft Tips and Tricks!
Pack as light as you can! The packrafts will take up some weight so making sure you pack a light as possible is a must. Sacrificing some comfort for a trip might be your best bet. Of course you can take a tent and sleeping bag but pack as minimal as possible. It is a good idea to try an shoot for under 40 lbs or 18 kg for total bike and gear. I am used to bike touring and all my gear weighs about 30 kg including bike, so for me this is quiet a cut down on weight. It is not a golden rule to stay under this 18 kg amount. The packrafts mentioned are able to carry a weight capacity of 250 pounds or 113 kg. So depending on your body weight and total gear. I am a lightweight so fo me I would be fine with a fully loaded touring bike on a packraft. But I will still be cutting down weight just for the sake of bikepacking on some gnarly terrain you want less weight anyway.
Your bags should be waterproof. This is a very good idea to have bags that are going to hold up to water from while rafting. Like I mention consider some dry bags if your current bike bag setup is not waterproof.
Try and test out your gear before you head off on a epic bikerafting expedition. You want to make sure you get a understanding of how everything works. You want practise in packing down your bike and master the way you will be strapping it to your packraft. Also if you are new to rafting you want to get some practise paddling too. Personally I have never really gone rafting before but I am sure I would get practise on the Murray River. But do take in mind that if you are completely new and get into the white water it is probably not the safest idea. Get some practise in calmer waters first.
Do some research into the location you will be travelling. Read up on what are the most common hazards or read local authority environment updates. Like for example in Australia during the summer it is a practical measure to see if there is any bush fires around the area I plan to explore. Depending on where in the world it is for you, that might be bringing precautionary items like bear spray for example.
Bring a repair kit and the appropriate tools not just for your bike. But also for the packraft. Don’t get me wrong the suggested rafts below are made for this type of adventuring, however they are not bullet proof and are prone to puncture sometimes. Have a puncture kit or a means of fixing your raft too is a necessary measure that needs to be considered. Especially if you plan remote adventure where accessibility is difficult.
Extra tie down straps for your bike. You want to make sure that thing is secured onto your raft real good! Don’t want your bike washing off downstream, that would be a nightmare. Avoid this by using heaps of straps and bring more spares just in case.
This is especially true for very remote adventures. That is bring a satellite phone or messenger. If you get into trouble out there you want some backup if needed. The Spot GPS Messenger or the DeLorme inReach Satellite tracker, are great options. These will allow you to send out a rescue signal anywhere in the world, even if you have no phone service.
When you pack your bike to the raft make sure to sit in the raft and check your paddle stroke, this is important. You want to make sure the bike does not get in the way when paddling.
Packrafts for Bikerafting
When looking for a packraft for bikerafting you just can’t use any packraft. Some a very cheaply made and may not stand up to the demands of a bikerafting trip. There is risk with poorly made packrafts to puncture and struggle to hold the weight of your bike. That is why it is best to invest in a packraft that is specifically designed for bikerafting and holding the weight of your bike. These raft typically have a stronger and more durable design, keeping up with bikerafting demands. Below is a list of the best packrafts for bikerafting.
What to look for in a Packraft for bikerafting?
But there are some extra details you need to consider in a packraft before you go out and buy one. It makes sense to get a packraft that is slightly longer as you will have the bike strapped to the front. Helps to maintain a efficient paddle stroke, the bike could limit your ability to reach forward with the paddle on shorter boats. Choosing a medium or large sized option for example of the Alpacka Rafts is a good idea. Also known as the Yak or Llama. This longer style works best with a bike as they are built to hold more weight.
Tie-downs are a must for a packraft, some models don’t actually have any. It makes it hard to get back in the boat after falling out with just wet and slippery tubes is all you have to grab onto.
Depending on the type of adventure you wish to undertake. Will depend on what specs your raft will need. In terms of extra you can upgrade some rafts at check out online.
Some models offer cargo fly zips, whitewater spray deck (design to cover your torso and stop water from getting into the raft.) Or even thigh straps to increase control. It is best to go for as minimal as possible. As you want as less weight as you can have without compromising. These packrafts weigh up to 2.58 kg as it is.
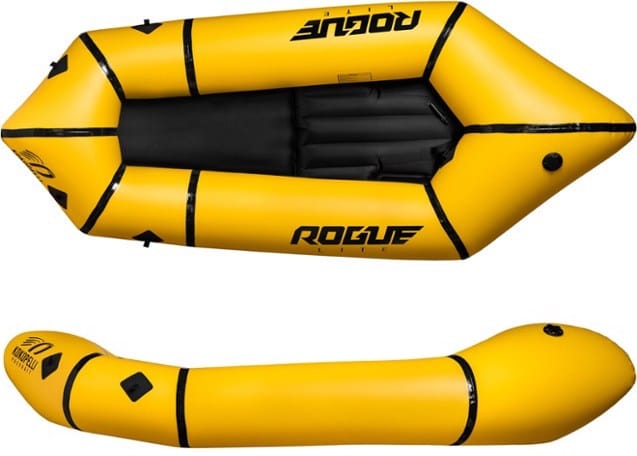
When it comes to pricing for a packraft suitable for bikerafting. You can get one suitable for most adventures from Kokopelli or Alpacka from $825. The Kokopelli Rogue Lite is the cheapest at the $825 from REI, out of the two options that I am looking at getting. There are other more expensive models out there, but are suited for epic expedition and hardcore style of bikerafting. And you get what you pay for.
Best Packraft For Bikerafting & Bikepacking
- Kokopelli Rogue Lite
- Alpacka Raft The Classic
The two most popular packrafts that are used with other bikerafters are the Kokopelli and the Alpacka as listed above. Lets compare the two and see which one would be best for your bikerafting adventures.
Kokopelli Rogue Lite

One of the great things about Kokopelli is they have never failed to innovate and improve upon there previous models. They started on Kickstarter and the idea got a lot of traction. They have listened to their customers and made what people are looking for. And when it comes the bikerafting this is a huge thing. Having a boat that is designed specifically so you can carry a bike on the front is a huge plus.
The Rogue Lite is their Adventure series boat which is a mid-option between a whitewater and lake designed models. It inflates with a D7 Leafield valve, that is one way design, meaning it prevents air from flowing back out when you’re topping the packraft. The twist cover is nice and flush and doesn’t get in the way when paddling. The spring in the valve is soft enough that it really does a good job at preventing any air from coming out. It does com with a top up tube as-well.
The seams on this raft a sown and then taped, which cuts some weight and overall bulk compared to the pervious welded joining on the older models. You get 4 tie down hooks or as they call them D rings at the Bow.
One cool thing about this packraft is how Kokopelli have designed the floor. It keeps your bottom from sagging below the water line. From the outside bottom the floor of the raft sits higher up of the waters surface, so when you ride over rocks you don’t feel it on your bottom. This results in a little bit less stability, but it is worth it. As it increases visibility and control. But as far as comfort and seating positions that initial loss in stability is outweighed. This raised floor also give your feet a stiffer foot brace. Anything under class 3 typically does not require a thigh strap with this boat.
It includes a inflatable seat which is longer then previous models and fullwidth. Which attaches to the inside of the boat by a single strap down cord. That holds well and does not allow the seat to move around much. Also the new material they have used for the seat feels much more solid and better quality. Just be careful not to over inflate or leave it exposed in the sun.
The material on this packraft is a Thermoplastic urethane-coated nylon which is thicker on the outside layer then previous models which definitely helps with abrasions. Speaking of which, you do get a patch kit that comes with 2 pieces of sidewall material and 1 piece of floor material plus repair glue. So if you do get any punctures you should be good the repair them in the field.
| Weight | Packed size | Weight Capacity | Cockpit Size | Depth | Width | Length | Price |
| 4 lbs. 13 oz or 2.18 kg | 7 x 18 inches or 17.8 cm x 45.7 cm | 250 pounds or 113 Kg | 51 x 15.5 inches or 129.5 cm x 39.3 cm | 16 inches or 40.6 cm | 37 inches or 94 cm | 7 ft. 1 in. or 2.159 m | From $825.00 |
As far as weight goes it comes in at 4 lbs. 13 oz or 2.18 kg. When packed up the rafts dimensions are 7 x 18 inches or 17.8 cm x 45.7 cm. it would be a tight fit on my Funn G-wide 500mm flared drop handlebars. It would make more sense for me to store a raft on the top of a rear rack, with a little hanging over the rack. It is best to carry with flat bars for bikepacking.
This packraft comes with a inflation bag that allows you to fill it in under 5 mins. Without using a pump. Please note that these base prices do not include a paddle which is another expense you will need to look into. There is more information about paddles and other gear that you may want to look into getting for a bikerafting adventure, down further below.
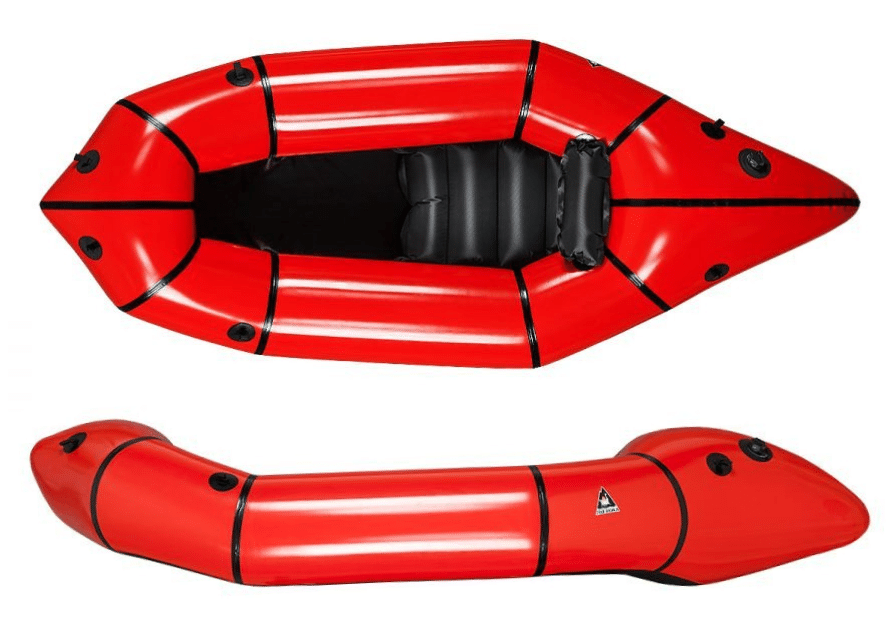
Alpacka Raft The Classic

This Alpacka Raft is their original packraft and comes in three different sizes. As mentioned earlier it is recommended to get a Medium (Yak) or Large (Llama) sized packraft specifically for bikerafting as the Small is not quite adequate for the extra space and volume to balance out a bike.

The Classic comes in three color options; Sierra Red, Cedar Green and Arctic Sky.
They are manufactured to order in Mancos, Colorado. Since 2000 the original Alpacka Raft was designed to be a true wilderness worthy packraft. The goal for Alpacka was to build a boat that was light enough to fit in a backpack yet would not let you down in the cold, rocky rivers of the Alaskan Arctic.
The Classic is a simple packraft with a no fuss seating system, minimalist attachments, and bombproof materials and construction. Making it a great option to attach to your bikepacking rig and set off on a bikerafting adventure.
You get the option to build to whatever configuration you like from; Open, Cruiser Deck, Whitewater Deck, Removeable Whitewater Deck, and Self Bailing option. These options cost extra, but the starting price for this boat is $850. When in comparison that is $25 more expensive then the Kokopelli Rogue Lite.
With the Classic you get the option further to add their innovative Cargo Fly zipper internal storage system with or without internal dry bags. Maybe you need more tie downs? You can add factory installed grab loops, strap plates, D-Rings, and handles or check out their high-performance Expedition models, which include double D-Rings and handles standard.
*All specifications below are for a Medium Yak Alpacka Classic Raft
| Weight | Packed size | Weight Capacity | Cockpit Size | Width | Length | Price |
| 5.7lb | 2.58kg | 16x7in | 41x18cm | 400lbs | 181kg | length 46in | 117cm x width 14.5in | 37cm | 37.25in | 95cm | 92in | 234cm | From $850.00 |
Depending on what your priorities are. This boat can hold up to 150 pounds or 68 kg more in overall weight capacity then the Rogue Lite. It is slightly heavier when packed at 400 grams more or 14.1 oz more then the Rogue Lite. When packed the dimensions of the two are similar but the Alpacka is a few cm shorter and they are roughly the same in width. However, the Rogue lite offers a significant amount more of cockpit space then does the Alpacka Classic. 117cm x 37cm / 46in x 14.5in for the Alpacka and 129.5 cm x 39.3 cm / 51 x 15.5 inches for the rogue Lite. The would mean more leg room in the Rogue Lite. However this is comparing to the medium sized Classic. While the interior width is the same as the medium. The Large (Llama) has a cockpit length of 49in or 124cm which is still smaller then the Rogue by 5.5 cm. Back to the medium Yak for example sake, compared to the Rogue Lite they have very similar external boat width. But the Alpacka comes out on top when it comes to length being 18.1 cm longer or 7.12 inches longer then the Rogue.
One thing that is different between the two boats is this classic comes standard with two extra stern grab loops which the Rogue fails to have. This could come in handy when providing extra line to grab onto when entering the boat from the water. That is one of the things that makes me consider this boat over the Rogue Lite.
How To Strap Bike To Packraft
Below is a handy video by Mark who I have been talking to through the YouTube comments. Go check out his channel if you have not already! He has a channel all about bikepacking and gear setups. He made a video below which shoes you one of many ways to strap a bike to a Rogue Lite packraft.
Bikerafting Gear List
There are some addition pieces of kit that you would want to look into getting if you want your bikerafting adventures to work best and provide maximum safety and efficiency when out there on the water.
- Packraft
- Paddle
- Satellite Messanger
- PFD – Personal Floatation Device
- Drysuit or waterproof pants and jacket
- Neoprene socks
- Spare Dry Clothes
- Dry Bags
- All other gear normally required for a bikepacking trip.
The Paddle
First you need a paddle as they will not often come with the packraft. But not just an paddle it needs to be a specific packable paddle. There are options out there that pack into four pieces making them ideal for bikepacking. When looking for a appropriate paddle length, weight and packability are the main factors.
As packrafts are wider then most boats you will require a longer paddle. Typically anything from 210 cm is a good length for most people. Most 4 piece fibre glass paddles are lightweight enough for bikepacking. Like this Werner Skagit 4-Piece Kayak Paddle has a length range of 210cm to 260cm. And weighs 2 lbs 7 oz or 1.11 Kg. This paddle that is recommended with the Rogue Lite packraft costs $155 from REI. But don’t take my word for it, read the customer reviews here.
Personal Floatation Device (PFD)
I am not aware of any specific PFD’s that are made or suited for bikerafting. But any adult PFD should be fine. But make it a very important step to get one. Don’t think you will be okay without. It is a necessary safety measure that must be taken. If you get a packraft you have to get a PFD too.
The best options seem to be the Closed-cell foam PFDs they are said to being much more reliable and practical than inflatable ones. Ideally you want one that again packs down small enough to pack on your bike. Something like the Astral V-Eight is recommended for a good bikerafting PFD.
Wet Weather Clothing
Due to the nature of bikerafting weather you want to or not you are probably going to get wet. Even if you think you wont it is best to be prepared for if you do. Same goes with your gear!
Staying dry and warm is important, a drysuit is a good idea. You will most likely get wet and be wet all day if it is chilly at least a drysuit can keep you dry on the inside and therefore warm. You could use waterproof pants and a jacket, but if you are swimming you are still getting wet, when a drysuit can stop water getting on the inside of your clothes. Another idea is to get yourself some gloves and neoprene socks, like the wetsuit socks.
It is a good measure to bring a spare pair of clothes that you can use at camp or of the raft. When you are wet you are cold and a nice dry spare pair of clothes can make settling into camp that much nicer.
If you can prevent wearing your bike shorts when bikerafting as the chamois pads absorb water like a sponge, lets just say it would be uncomfortable. Fleece is one of the best materials when it comes to wet conditions, absorbing less then 1% of its weight in water and had abilities to keep you warm even if you are wet.
Packing For A Bikerafting Trip
Packing is not much different then a bikepacking trip. However the only difference is changing out and packing gear that is more suitable for a bikerafting adventure, like the satellite tracker, wet weather gear, paddel and of course the packraft. Making sure to master where everything goes and that you have all the essentials for such a trip you are good to go!
Keeping Gear Dry!
When packing your gear on your bike you want to have waterproofing as one of your top priorities. For obvious reasons! So making sure that you use dry bags to store all your gear that you don’t want to get wet. Which is probably everything inside your bags. especially if you capsize everything is going to be submerged. Looking a double bagging gear with trash bags but your best option is do just use a heap of dry bags for everything.
If you prefer Revelate Designs has the Revelate Designs Egress Pocket Handlebar Bag which is waterproof making for a safe haven for camera gear and stuff that you want in the boat but it is important that it stays dry. Any dry bag option is your best alternative like the Sea To Summit dry sacks.
Learn More About Packrafting
Depending on how confident your feel in the water. Maybe you are like me and have no real experience rafting you can get some knowledge and improve the skill. If you lack confidence on the water water it might be a good idea to take a whitewater safety course in your local community. To brush up on the basics to build some confidence.
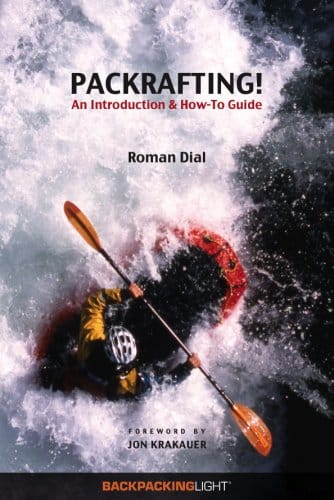
If you want to read more about packrafting and other water adventures there is so many cool films online and some books too. Below I have compiled a list of some resources that you can look further into if you want more knowledge about the topic. I am definitely getting the “Packrafting How To Guide” below, before I head out onto the water!

PACKRAFTING! is about exploring wilderness and whitewater by packraft, a lightweight, portable boat usually weighing less than five pounds. Written by well-known packrafting instructor and adventurer, Roman Dial, this is the first book published on the topic. The slim volume offers both stories and instruction with full-color photographs from trips around the world. Dial shares information about gear and technique as well as the many applications for using small, packable boats. Packrafting can be combined with mountaineering, backcountry skiing, mountain biking or trekking as part of long expeditions, or short day trips.
More Reads Of Epic Water Adventures

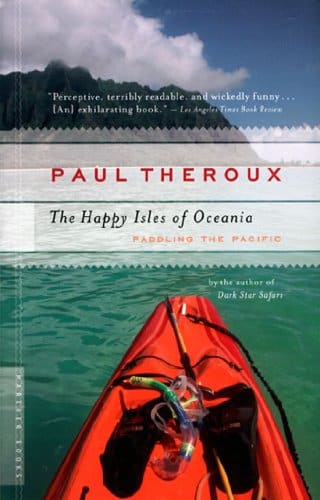
Happy Isles of Oceania by Paul Theroux
