I am writing this article from my own personal experience. I just purchased a nice new Kona Sutra LTD 2020 gravel/adventure bike. After getting back from the Vic Divide this year, a 570 km+ MTB route.
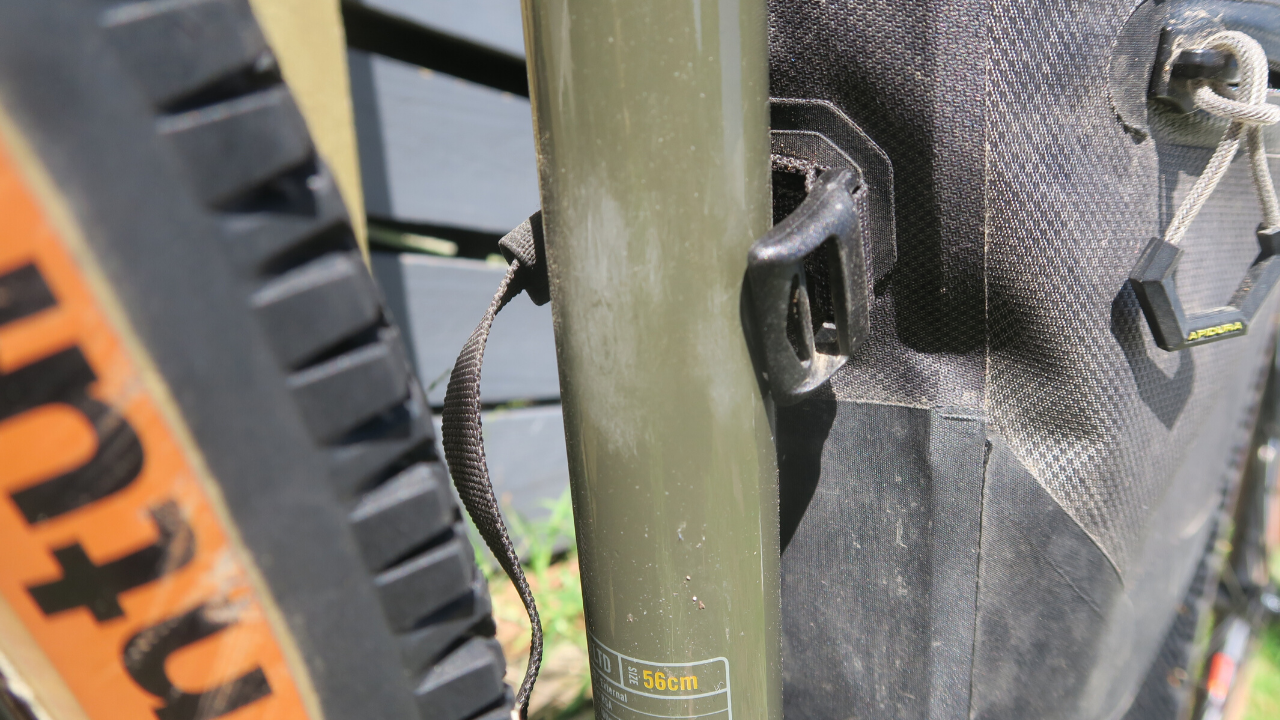
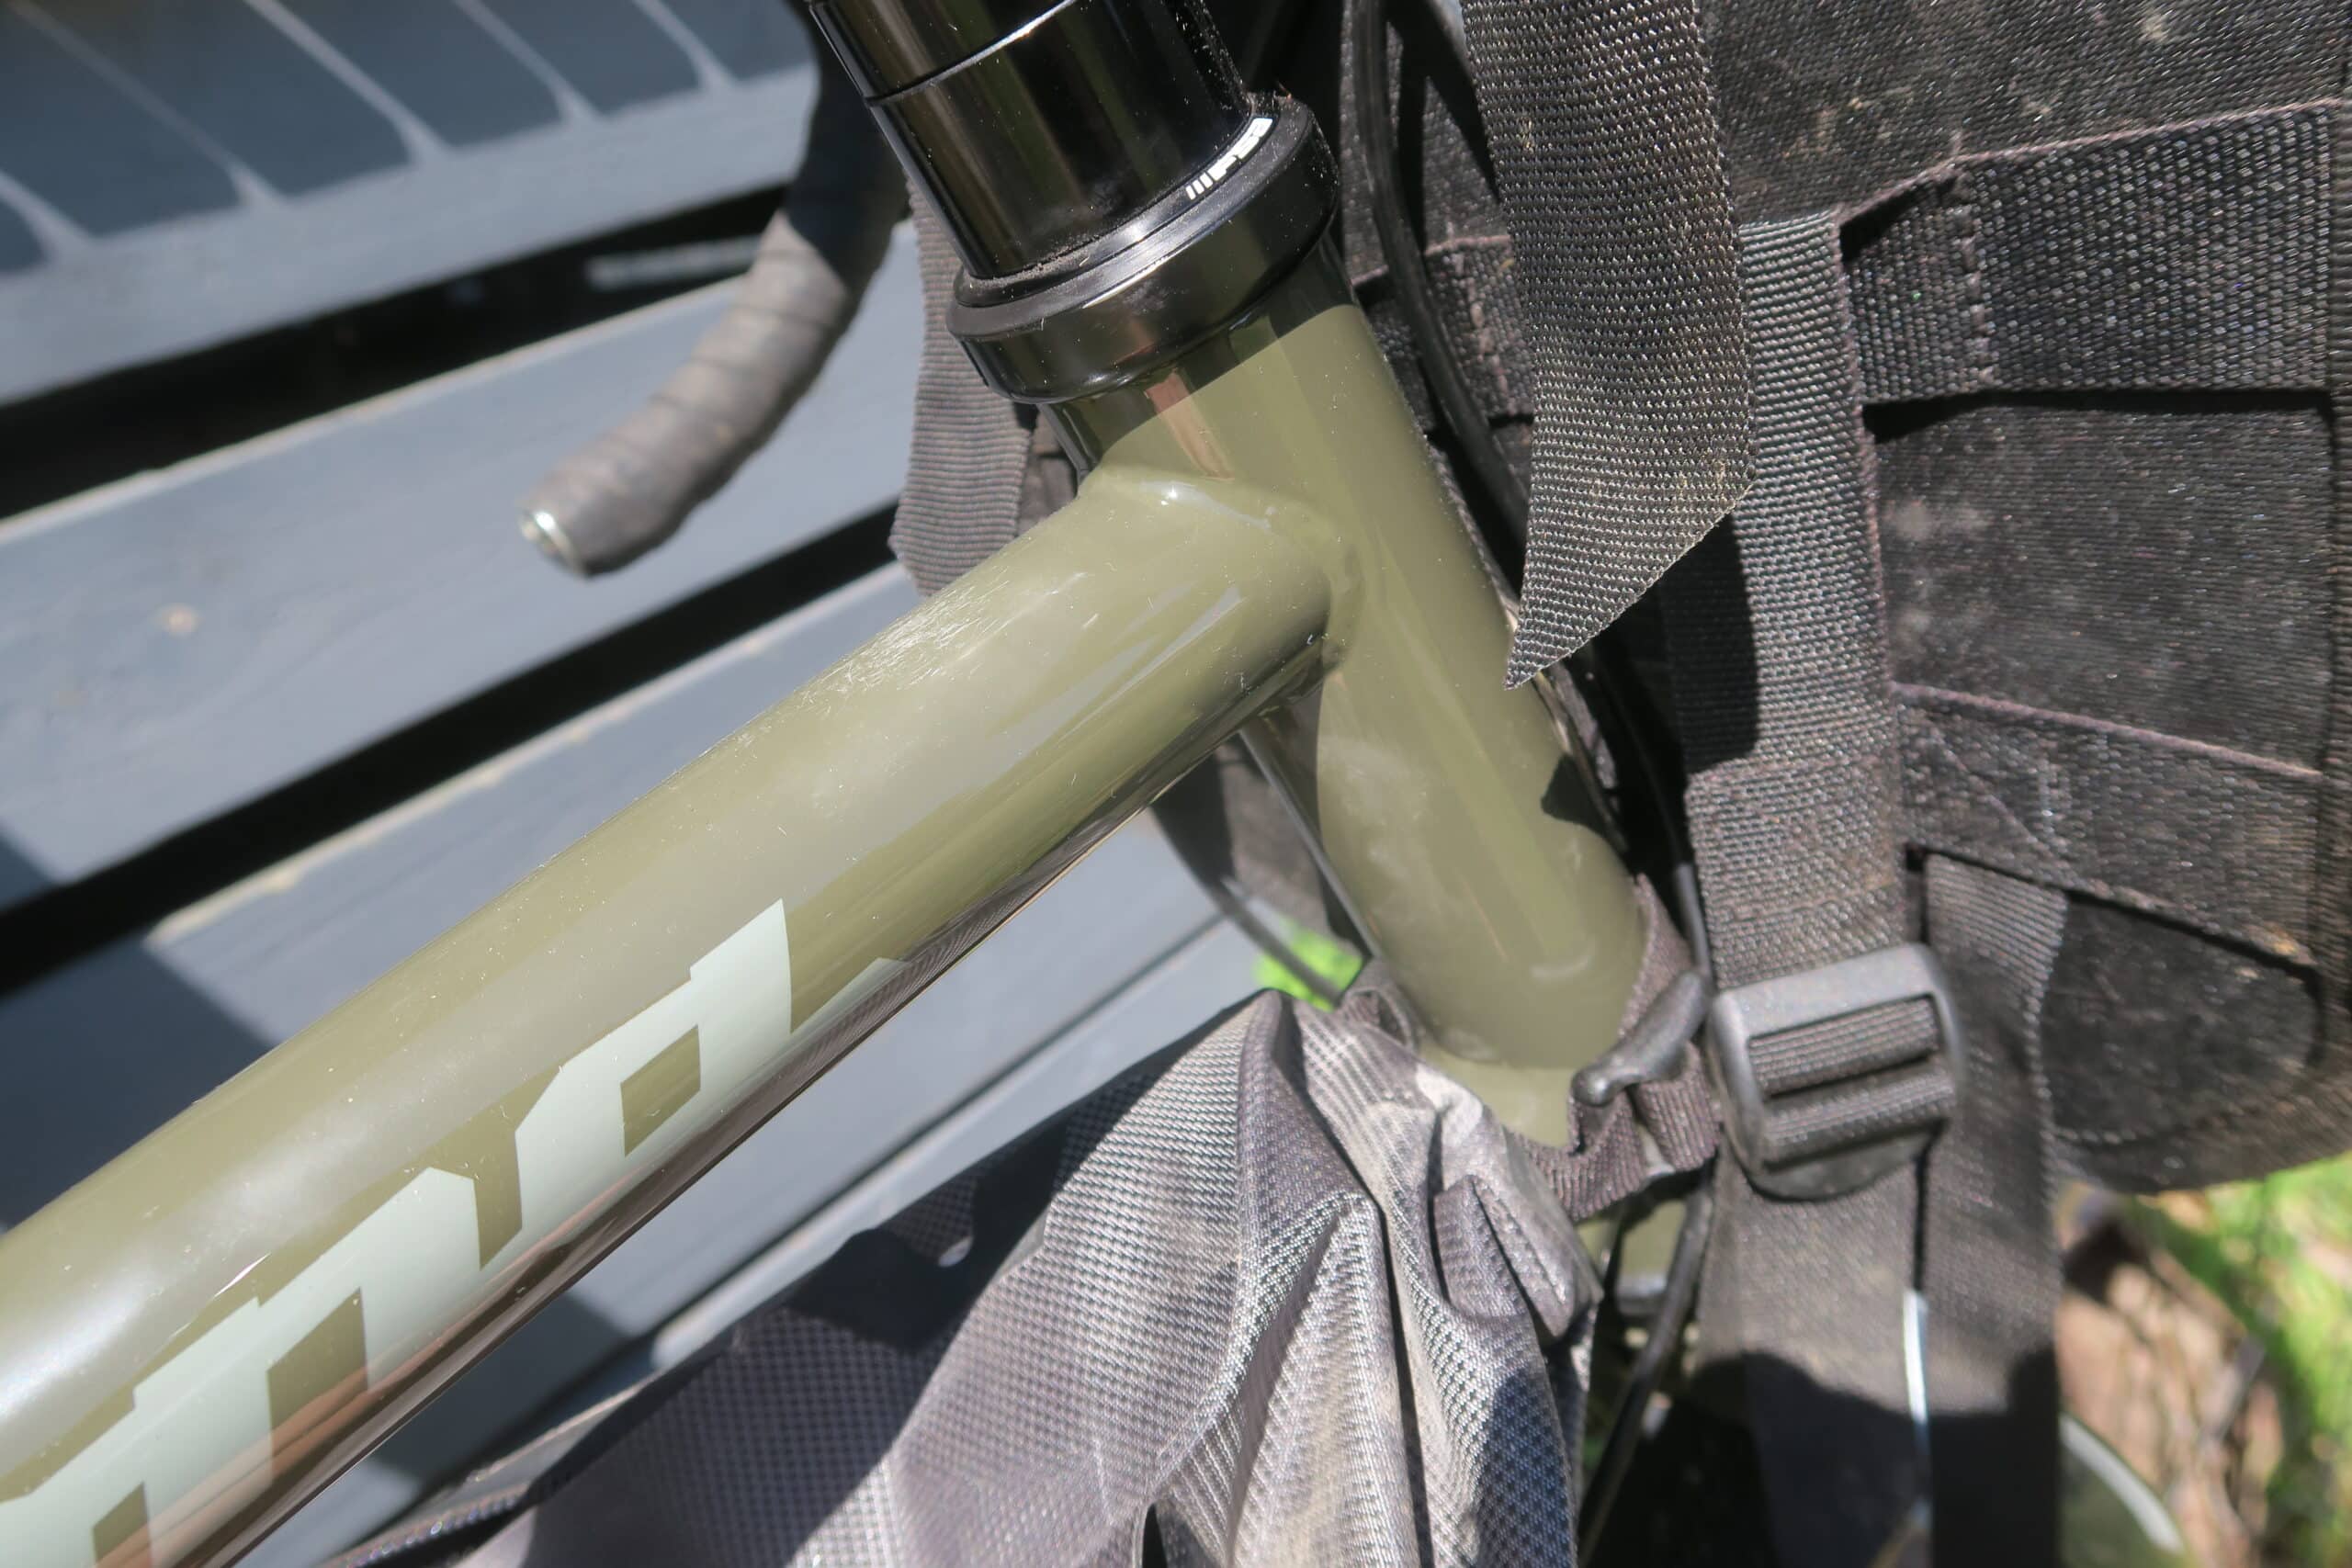
Which is a rough route that was rather hard on the bike and in more particularly the frame. My bike has a frame bag, saddle bag and handlebar bag that all ended up rubbing on the frame and on those contact areas the frame has scratching and the paint has started to fade, the bike is barely 1 month old!


After this occurred on my bike, I wish I had known more about bicycle frame protection and how I could protect my bike frame. I never really knew that it would have been a possibility after only riding 600 km on the bike.
But take it from my own wrong doing and if you are just in the stages of purchasing a new bike or all ready have one. It might be worth taking the steps to ensure your frame stays in as best condition for as long as possible. It was a little deflating spending $2,600 total on all my gear to have it ‘worn down’ rather quick.
How do you protect a bike frame?
So how do you protect a bike frame? What can you do to make sure this doesn’t happen to your brand new bike? Okay lets get into some of the ways you can ultimately protect your bike from scratches and scuffs.
There are quiet a few ways to protect your bike frame from marks and scratches. These include; gorilla tape, helicopter tape, rubber mastic tape, gun grip tape, and various bike frame protector kits.
The tapes simply work by apply the tape over the frame where you want it to be protected most. Or you could cover your whole frame. But for me these places on the frame are certain areas on the main tubes of the frame (top tube and down tube..) where my frame bag attaches around the frame. Also around the fork above the front wheel. And near the head tube where the cables would rub.
When you get a bike frame protector kit it comes with a number of pieces which are ready to be attached to the bike. You can expect, Tube Shields, Stay Shield kits and Cable Shields. It is really up to you what you opt for. It seems if you want a really nice finish on your bike a protector kit is best. But for me I just opted for a roll of tape which I can customise to fit how I like on the frame for protection from bike bags and cables.
How do I stop my bike cable from rubbing?
Cables are one of the main culprits for scratching bike frames over time. So how do you stop cable rub? You want to first make sure that the cables are as short as possible without them restricting the handlebar moving fully.
- Mark and measure the area you want to cover.
- Give the area a quick rub down with some Isopropyl alcohol. This will remove any grease, making sure the tape sticks securely.
- When apply the piece of tape over the area, make sure to stick it from the middle outwards. This will makes sure that any air will not be trapped as you apply the tape.
Bicycle Frame & Paint Protection Products
There are many different products for frame protection and brands for the matter.
Helicopter Tape
It is recommended if you choose helicopter tape to get 3M Helicopter Tape this is said to be one of the best tape option when it comes to protecting your bike frame.
How to Protect Bike Frame From Scratches With Helicopter Tape
How to Install tape on the frame
Step 1: Cut the tape to desired shape
Step 2: Remove the tape backing and apply the tape to the area that needs protection
Detailed Installation Instructions:
Using the tape is fairly simple and requires either razor knife or a pair of sharp scissors for cutting the material. Just unroll the tape and cut it off to the required length. Further shapes can then be cut as needed for wherever you will be placing the tape. A multitude of shapes can be created to fit any sort of frame or placement that might be required. Some pretty exotic patterns can be designed.
Once the tape is cut to the length and shape that’s required,separate the backing from the tape and then place the tape in it’s designated spots. Don’t press it down hard yet until you have it where you want it,that makes it easier to pull the tape backup and manoeuvre it around. If you pull up the tape too many times you
will need to start with a new piece.
Once you have it in the proper spot, press hard and smooth the tape onto the surface, making sure to get out any air bubbles. It conforms to undulations fairly well so just roll it into those spots, and it will stay. When doing long or large pieces start at one end and slowly lay down the tape,re-lift it as needed to manoeuvre it around while you press the tape along its length. The tape also has a good resiliency and stretches when needed for bendsand undulations.
When the tape gets old or gouged up, simply replace that piece. I suggest that you should make sure the bike and tape are in a fairly warm place before you do any removal. If the bike has been cold for a period the tape adhesive can pull up the clear coat or paint. This is a rare occurrence, but it can happen. A simple
hair dryer to warm everything up will do the trick.
In high usage area that get a lot of dirt such as the inside of the rear triangle, dust and dirt will creep in behind the tape, and it will need more frequent replacement.